
这是一份面向初学者的分步指南,介绍如何从官方非免费仓库在 Debian 13 Trixie 中安装 NVIDIA 驱动程序。
与 Ubuntu 不同,Debian 仓库中的 NVIDIA 驱动程序有点过时。截至目前,它包含的是 NVIDIA 550.163.01,而最新版本已达到 580 系列。
步骤 1:启用非免费仓库
对于 Debian,NVIDIA 驱动程序包位于非免费仓库中,但默认情况下未启用。
以前,我们可以使用 add-apt-repository 命令或软件和更新(software-properties-gtk)来启用仓库。然而,在 Debian 13 中这些工具不可用。
要启用非免费仓库,请启动终端并运行以下命令,通过 nano 命令行文本编辑器手动编辑源文件:
sudo nano /etc/apt/sources.list
当文件在终端中打开时,在每个源行的末尾添加 contrib non-free(如果不存在,还要添加 non-free-firmware)。
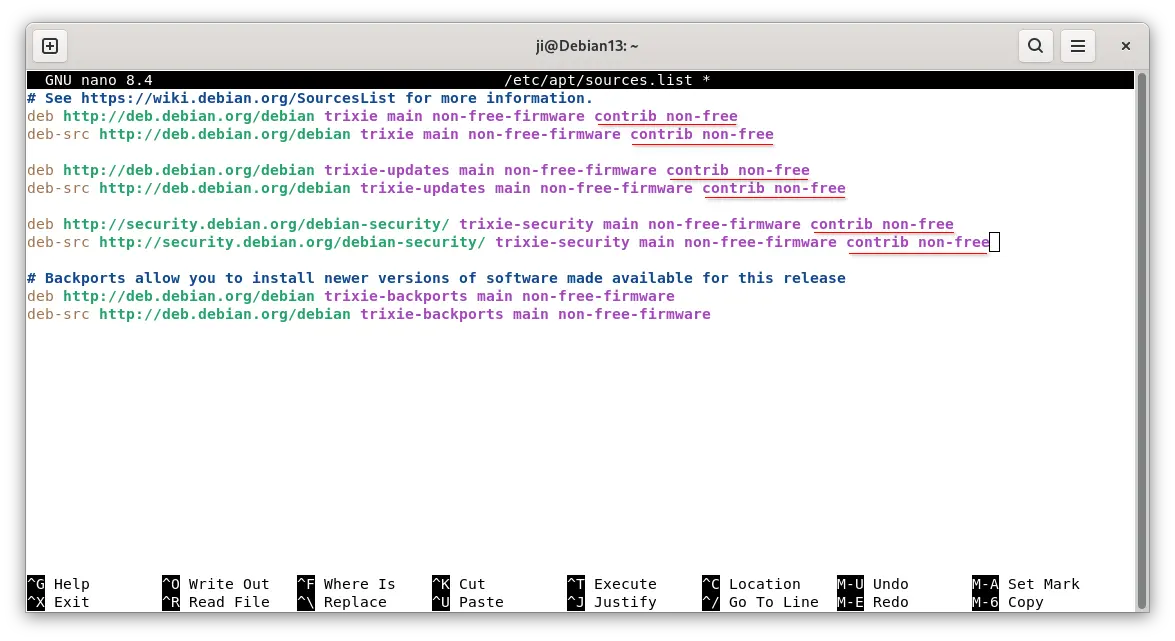
之后,按 Ctrl+S 保存,按 Ctrl+X 退出编辑器。最后,运行以下命令 刷新软件包缓存:
sudo apt update
步骤 2:为安全启动注册 MOK 密钥
Debian 定期更新其内核(次要版本)以进行安全更新和修复。为了避免每次都重新构建内核模块,使用了 DKMS,但需要使用机器所有者密钥(MOK)进行签名以支持安全启动。
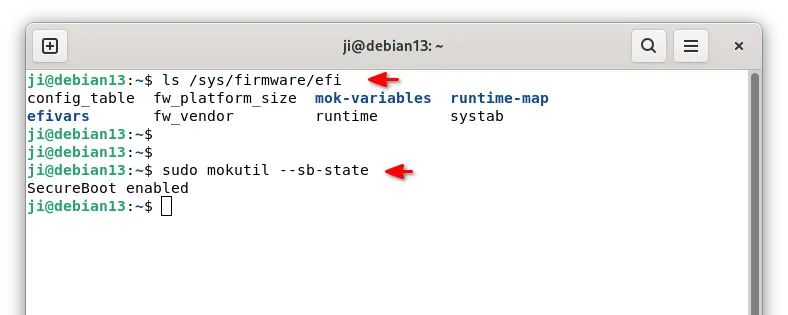
1. First, run the command below to check if Debian was installed with UEFI boot by running the command below in terminal:
ls /sys/firmware/efi
The command tells to list the /sys/firmware/efi directory content. If it says “No such file or directory”, then you have Debian installed as legacy boot.
2. Next, run command to check if secure boot enabled:
sudo mokutil --sb-state
If both UEFI and secure boot enabled (as the screenshot below shows you), then you need to run commands below one by one to create and enroll MOK key.
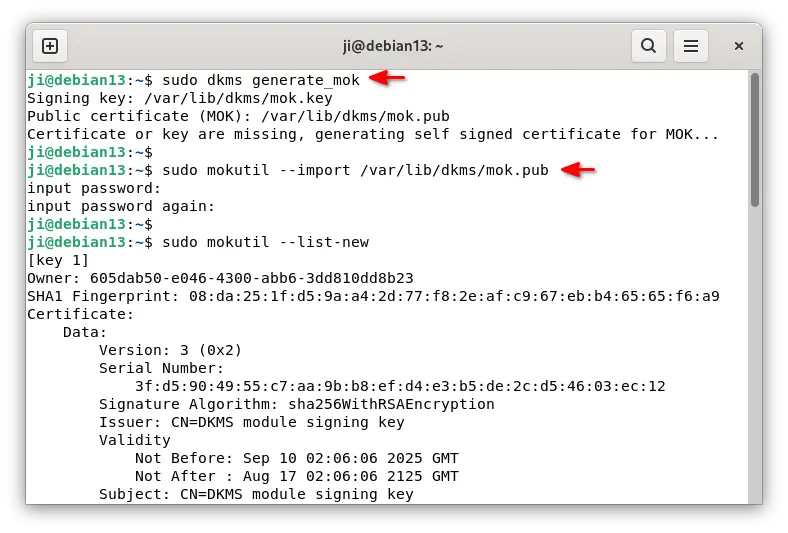
3. First, run the command below to manually generate a mok key.
sudo dkms generate_mok
Run sudo apt install dkms if the dkms command not found, and set a password for the key.
4. Next, run command to import the key:
sudo mokutil --import /var/lib/dkms/mok.pub
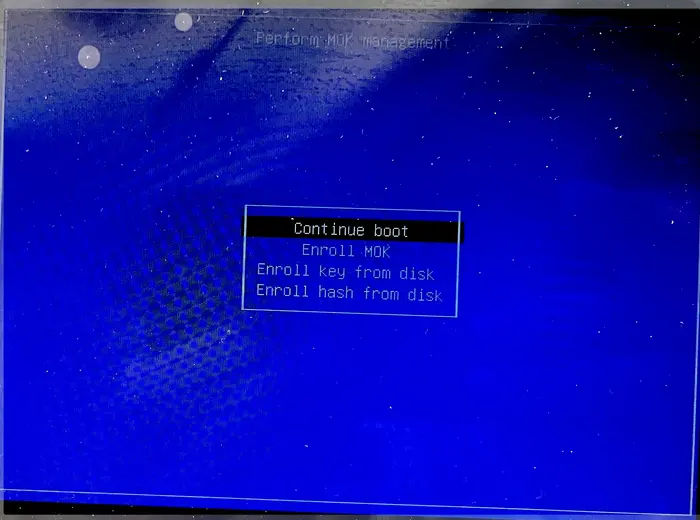
5. Finally, reboot your computer. At next boot, it should pop-up a screen (see the screenshot below), asking to perform MOK menagement.
There, just choose to Enroll MOK -> continue -> confirm -> enter password (you set when creating the key) -> reboot.
Step 3: Install NVIDIA Driver
After enabled non-free repository and enrolled MOK key, you may then run the commands below to install NVIDIA driver.
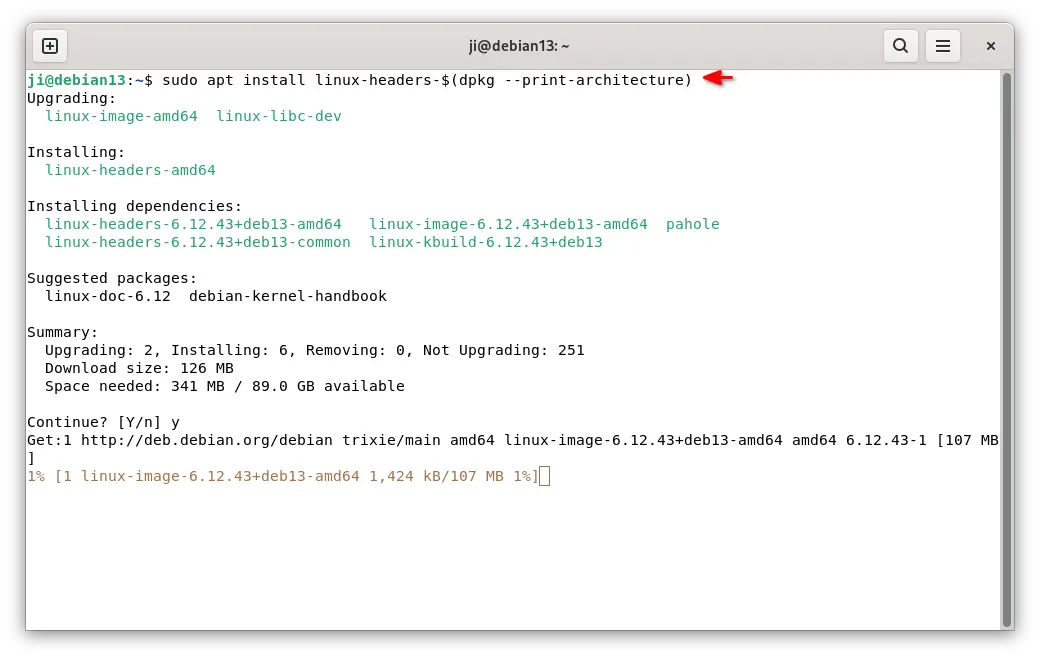
首先,为DKMS安装内核头文件:
sudo apt install linux-headers-$(dpkg --print-architecture)
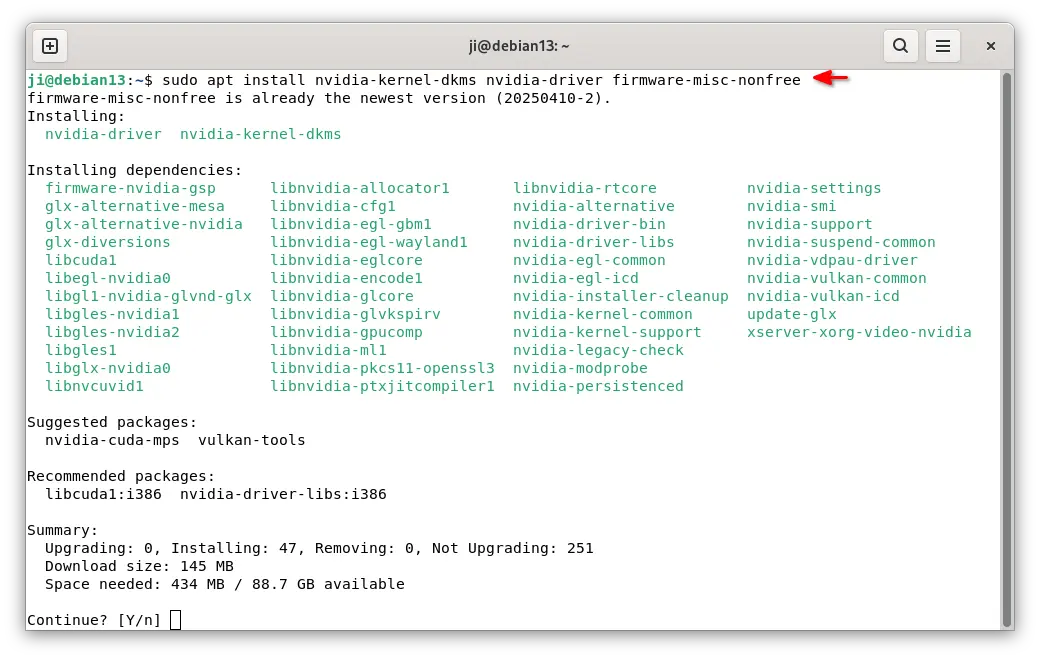
然后,通过以下命令安装NVIDIA专有驱动程序:
sudo apt install nvidia-kernel-dkms nvidia-driver firmware-misc-nonfree
对于’open’版本,请将nvidia-kernel-dkms替换为nvidia-open-kernel-dkms。
重新安装驱动程序后,重启您的计算机。
步骤4:为GNOME、KDE Plasma启用Wayland
对于GNOME或KDE Plasma用户,安装NVIDIA驱动后可能会回退到传统的Xorg会话。如果您需要Wayland会话,请按步骤依次执行以下操作。
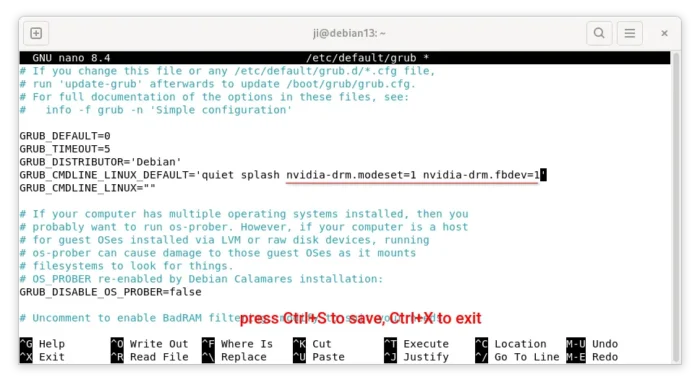
首先,运行以下命令编辑Grub引导加载程序配置文件:
sudo nano /etc/default/grub
然后,将nvidia-drm.modeset=1 nvidia-drm.fbdev=1添加到GRUB_CMDLINE_LINUX_DEFAULT的值中。
options nvidia-current NVreg_PreserveVideoMemoryAllocations=1
最后,保存文件(Ctrl+S)并退出(Ctrl+X)。在下次启动时,您应该能够从登录屏幕选择Wayland会话。
步骤5:在NVIDIA和集成显卡之间切换
对于同时拥有集成显卡和专用NVIDIA显卡的笔记本电脑,安装驱动程序后默认以混合模式工作。
通过NVIDIA显卡启动应用程序/游戏,而将其他应用程序留给集成显卡处理
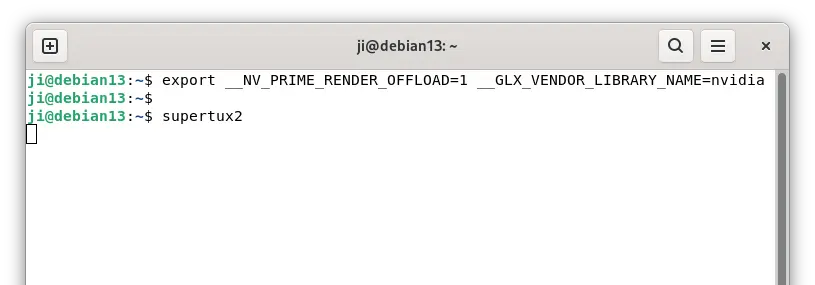
要使用NVIDIA显卡运行应用程序或游戏,而将其他应用程序留给集成显卡处理,首先运行命令设置环境:
export __NV_PRIME_RENDER_OFFLOAD=1 __GLX_VENDOR_LIBRARY_NAME=nvidia
然后,从该终端窗口启动的任何应用程序或游戏都将通过NVIDIA显卡进行渲染。
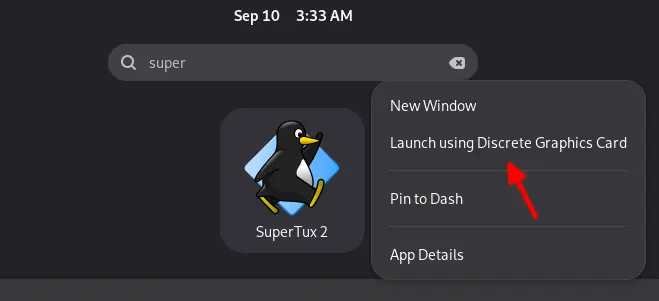
对于GNOME,只需右键单击应用程序或游戏,然后选择”使用独立显卡启动”。
切换到仅NVIDIA或集成GPU模式
注意:不知道为什么,这一步在我的Wayland会话中不起作用!
与Ubuntu不同,Debian没有用于在集成和NVIDIA GPU之间切换的nvidia-prime包。但是,有一个名为’envycontrol‘的免费开源工具可以完成这项工作。
1. 首先,从其发布页面下载软件包(是’python3-envycontrol_xxx_all.deb'):
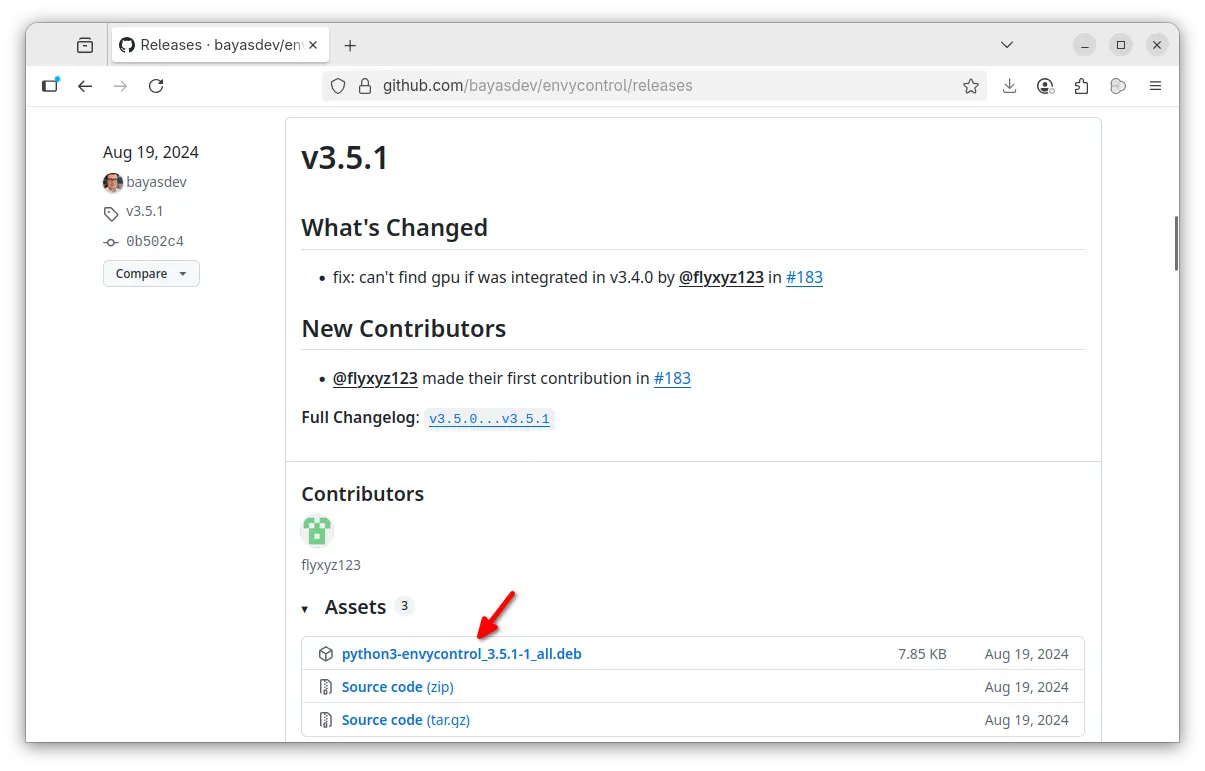
2. 下载包后,打开终端并运行命令来安装它(假设您将其保存在”下载”文件夹中):
sudo apt install ~/Downloads/python3-envycontrol*.deb
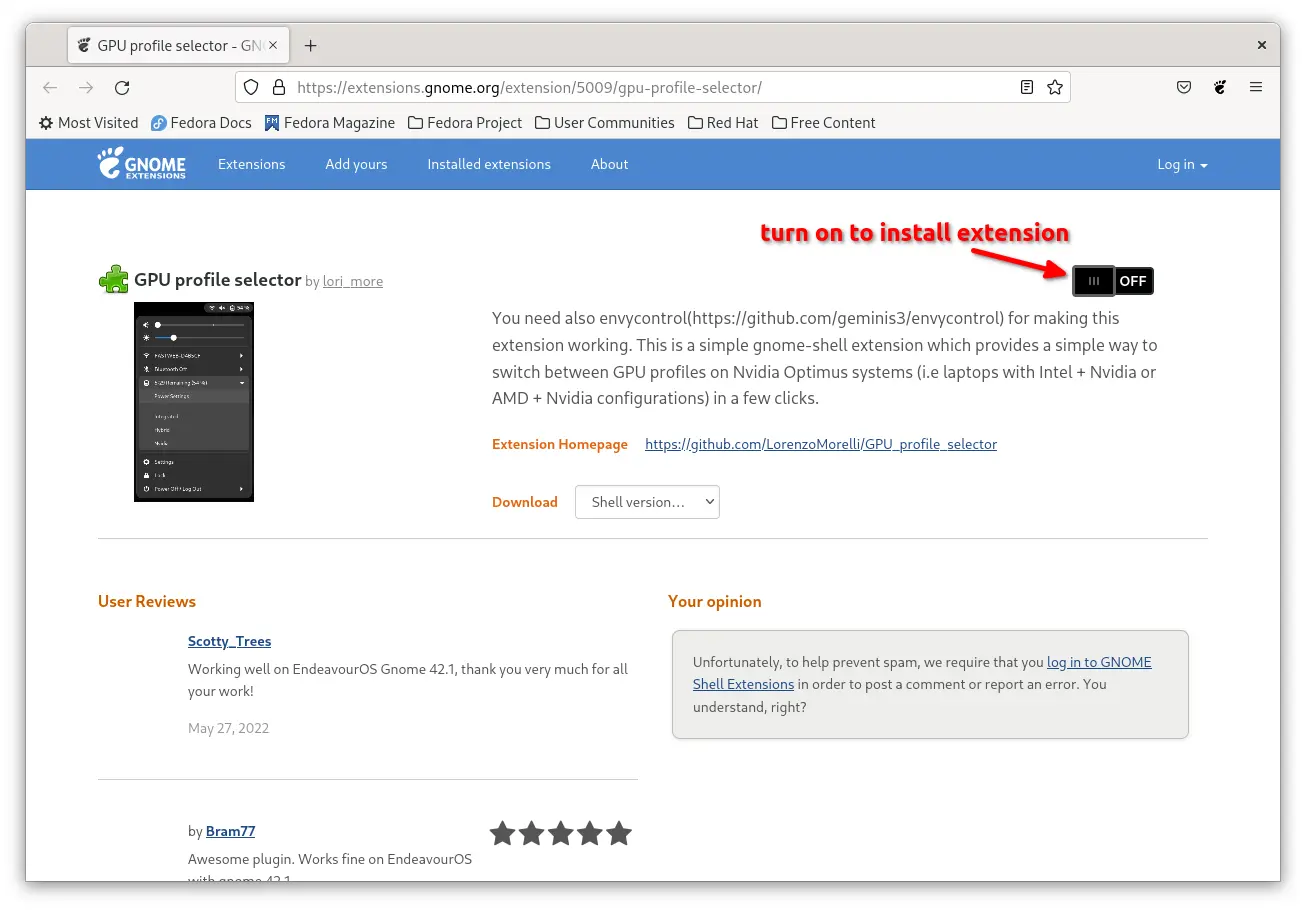
3. 安装完envycontrol后,您可以运行以下命令之一
sudo apt install gnome-browser-connector
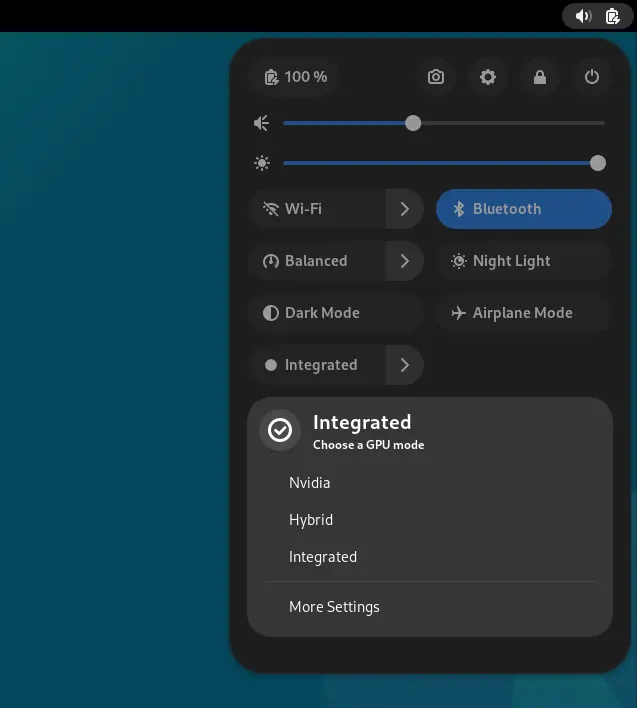
完成后,您应该能够通过右上角的系统菜单(即快速设置)切换GPU。
第6步:验证和监控GPU使用情况
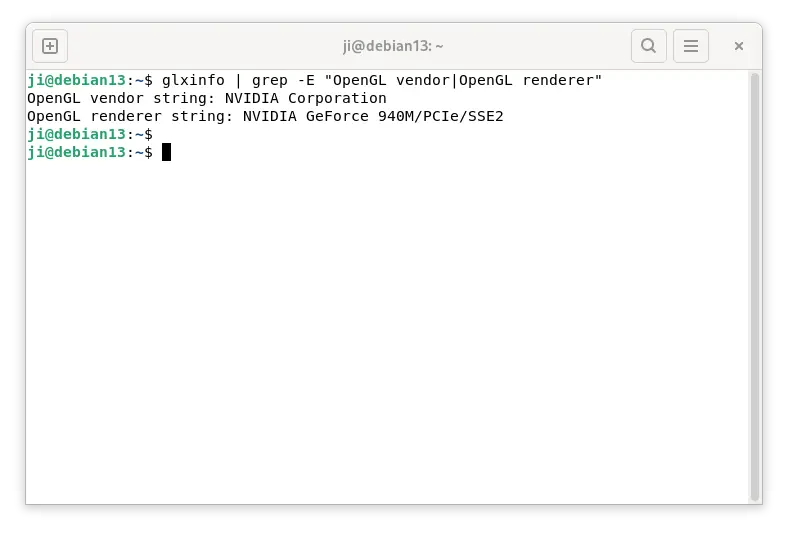
在Xorg会话中,您可以运行以下命令来确定当前正在使用哪个GPU:
glxinfo |grep -E "OpenGL vendor|OpenGL renderer"
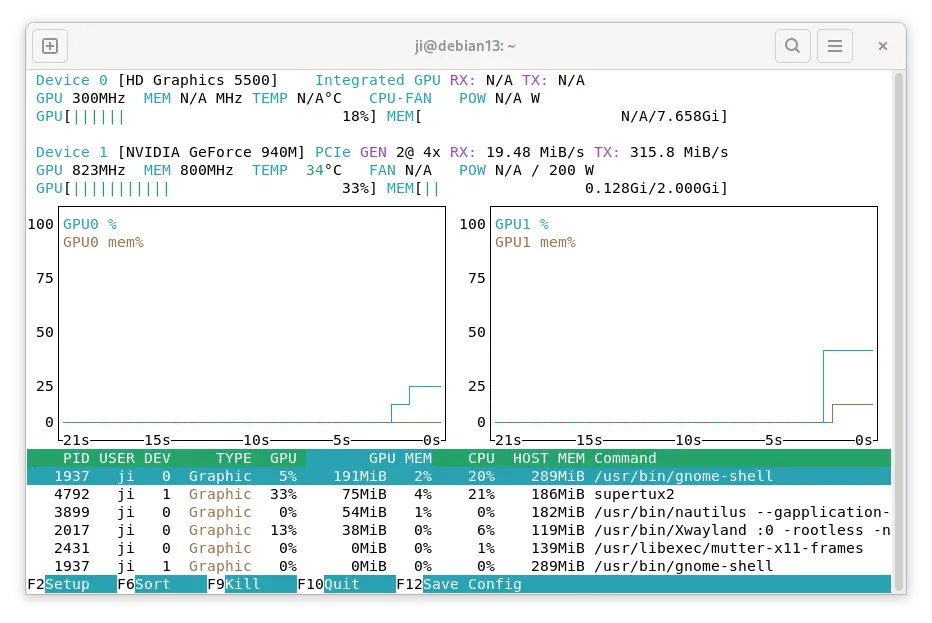
此外,通过运行sudo apt install nvtop命令,您可以随后运行nvtop命令来监控您的GPU使用情况。
此外,对于有系统睡眠和唤醒问题的用户,可以尝试启动以下3个服务,可能会有所帮助:
sudo systemctl enable nvidia-suspend.service
sudo systemctl enable nvidia-hibernate.service
sudo systemctl enable nvidia-resume.service
更多信息,请阅读官方的Debian wiki页面。


 扫码关注公众号:智享开源

评论功能已经关闭!